August, 30, 2021 by Andrew Farmer in BJD and Smart Doll Printing
One thing about the Smart Doll that originally drew me to it as a product was its frame. The frame sits underneath the vinyl body and is the heart of articulation for the doll. All vinyl shell pieces are heated up with a heat gun or hairdryer and wrapped around the frame. Some of the areas like the upper legs are a very tight fit and almost stick to the frame.
Many years ago, you could buy the frame disassembled, which was really cool if you were into building gunpla or the likes.
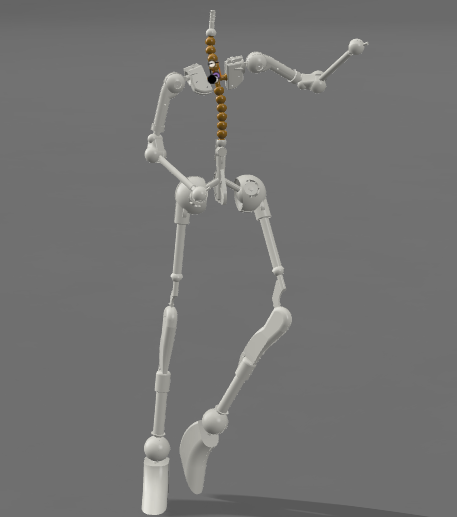
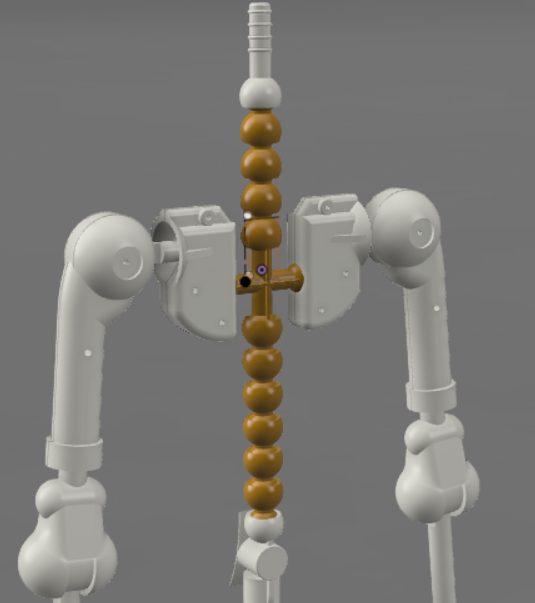
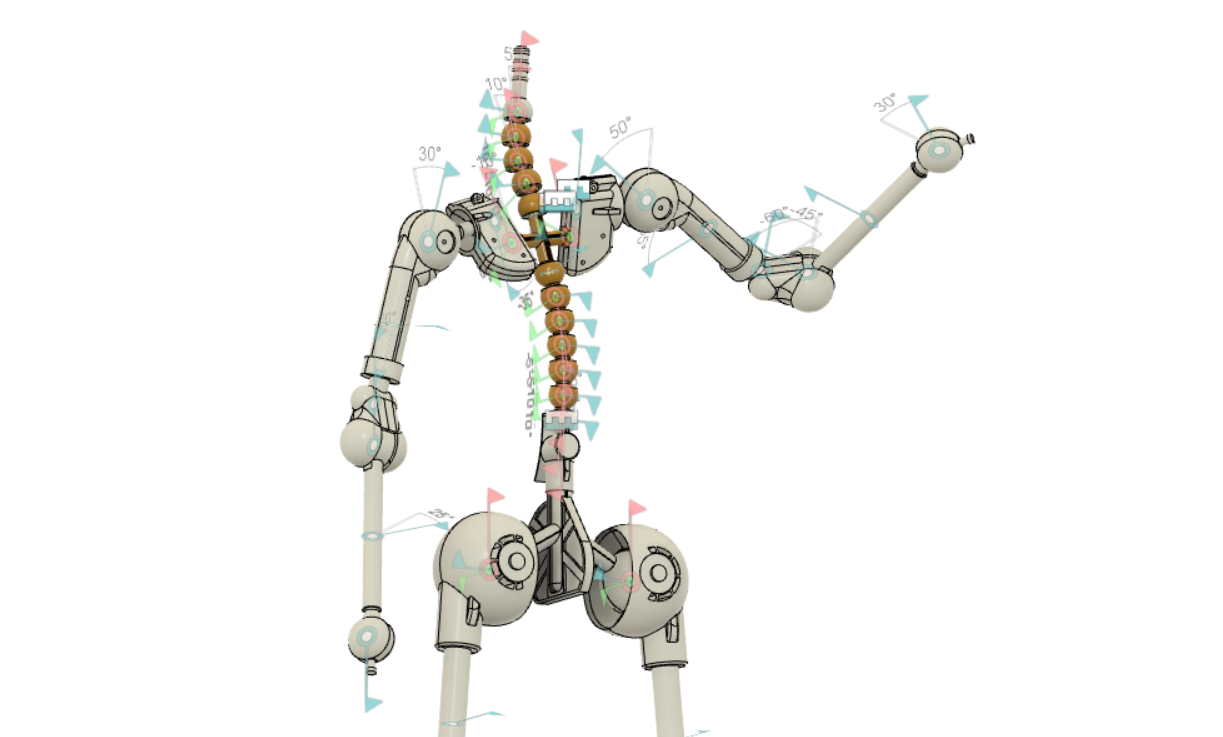
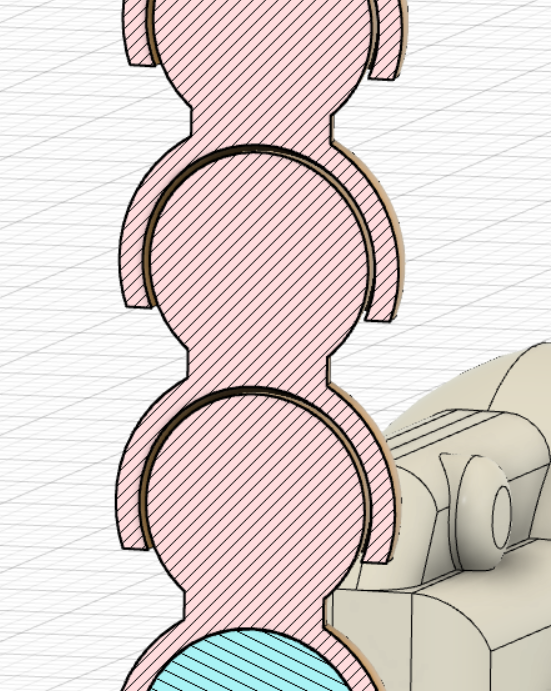
Using my own Smart Doll as reference, as well as images from the internet and Smart Doll website, I set to work learning more about CAD programs like Fusion360 and creating my own replica of the frame. The first thing of note was the spine of the frame, which replicated almost a human like spine with 9-11 ball-joints with a decent amount of flexibility to them (30 degrees each).
Next was the shoulders, upper arms, elbows, lower arms and wrists. All of these combined gave the frame an incredible amount of articulation. Shoulders and upper arms allowed for 360 degree Y/Z axis movement, and 200 degree X/Z movement. The double jointed elbows allowed for a greater range of arm movement, including the ability to rotate 360 degrees on the X axis using the joints between the upper arm and elbow.

Example of the flexibility of the arms and shoulders presented in Fusion360
Another example, this time showcasing some articulation in the spine as well.
Up next was the pelvis, hips and upper legs. The hips had a decent amount of flexibility in them, being able to rotate 50 degrees along the X axis, and 360 degrees on the Y/Z axis. Clearly this was not needed, and at max 180 degrees would be needed there.
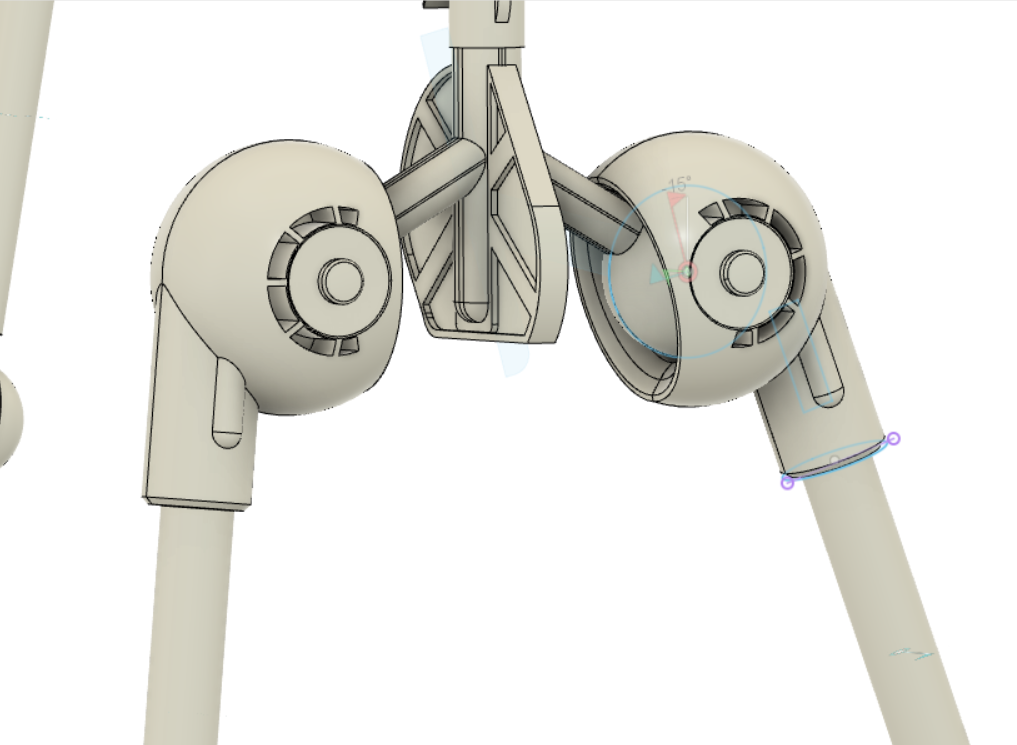
The Hips and Pelvis are made of multiple parts in order to print on a SLA printer easier
Finally, and most importantly, was the legs. The legs proved a little challenge in that I was running out of space. The scale of the replica was growing and I had to be careful with my measurements. I couldn’t make the legs too tall, otherwise the top half would look very silly. This proved a problem with the lower legs, which I had to make shorter than I would have liked to. The legs have a large amount of flexibility. The upper leg-to-knee join is able to rotate 360 degrees on the X/Y axis, the knee is able to bend 110 degrees backwards and the foot is able to rotate 360 degrees on the X/Y axis as well as move back and forth on the Y/Z axis.
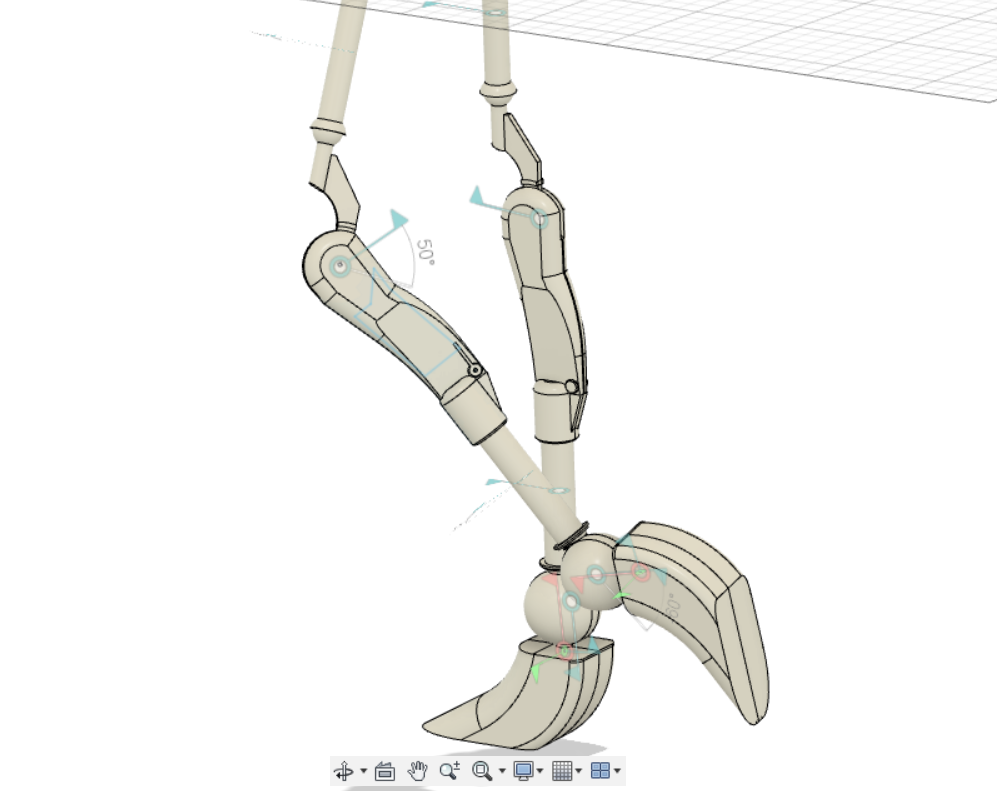
An example of the legs articulation
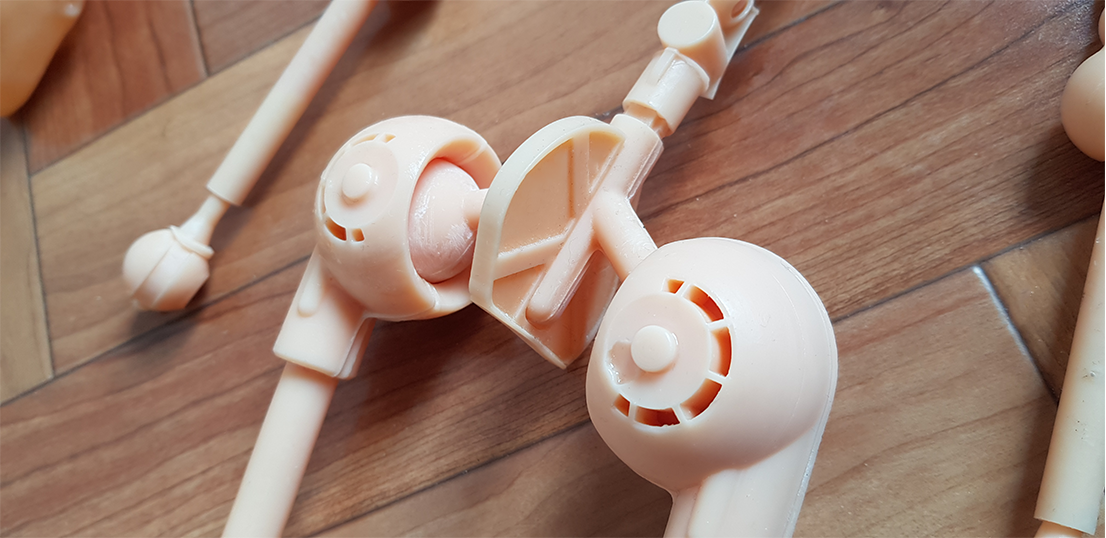
By far the most challenging part of creating a replica was printing the parts and connecting them together. Despite doing my best to measure accurately, the material I was using (fragile UV resin) proved very stubborn when connecting together, often either slightly too big and shattered upon joining, or too small and loose, proving no connect ability. This showed the weakness of ordinary UV resin, which really should not be used for interconnected moving parts. I must have wasted at least 1 litre of the stuff reprinting parts only for them to break again. I had to make several minor measurement adjustments over a month and a half to get it just correct, only for it to break from myself making a careless mistake. In the future, it would be wise to print with a flexible PLA, ABS or resin. These materials can be costly however. Flexible resin in Japan is difficult to get, and can cost at least 8000円 for 500ml.

A graveyard of broken, mismeasured pieces.
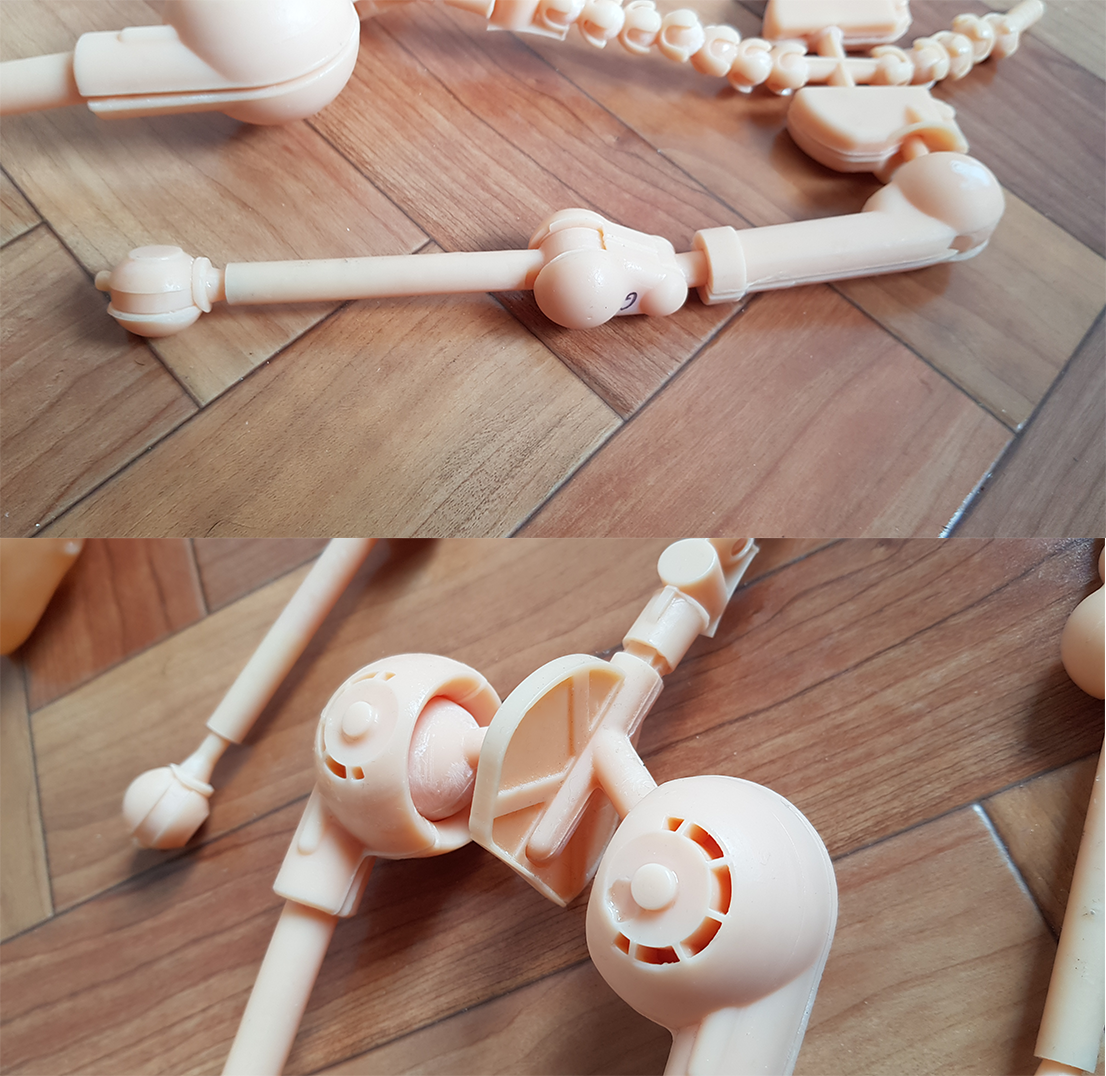
As assembly continued, I had to use sandpaper and files to make slight adjustments to the printed pieces, being careful not to over- sand and make joints too loose. It’s important to wear a mask when working with sandpaper and resin as it creates a fine dust which can be bad for your respiratory system.
And the final result…
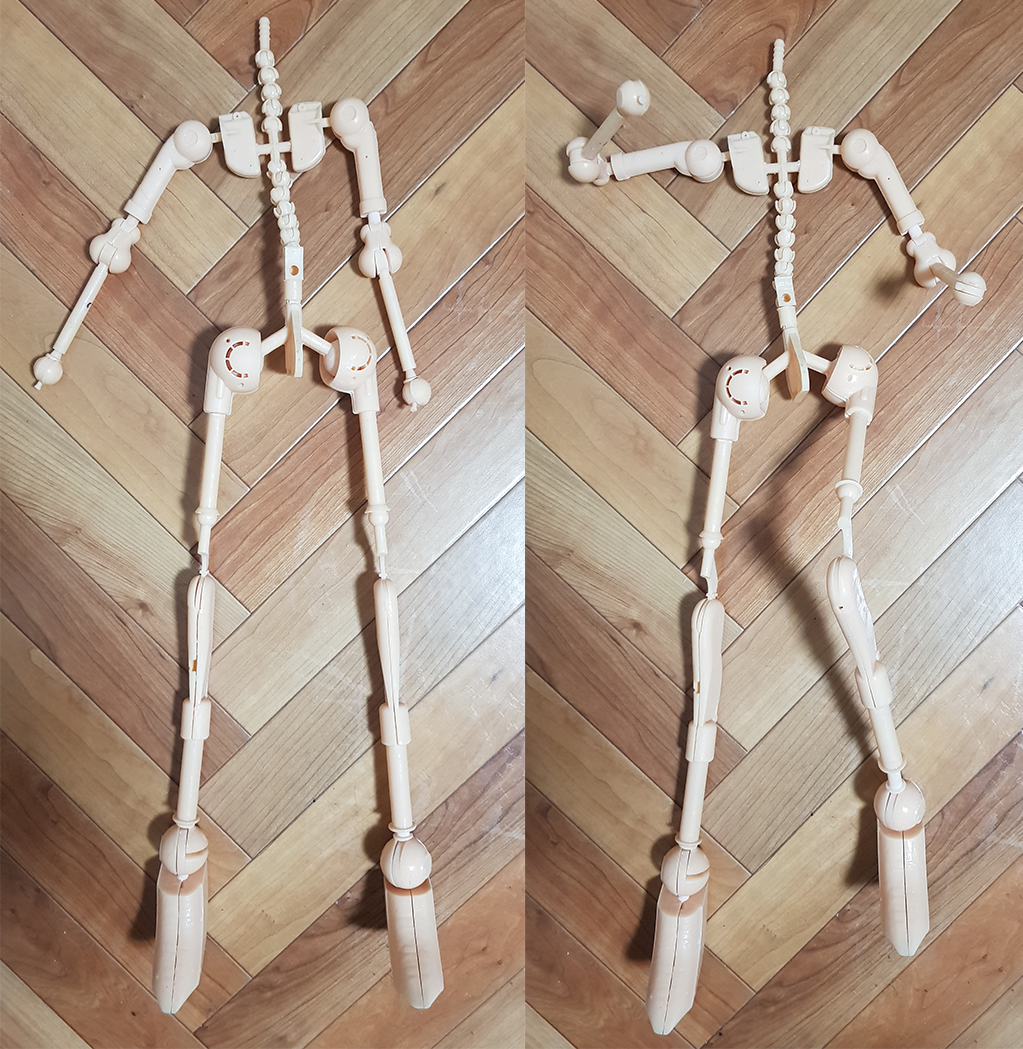
Well, after a colossal amount of trial and error, we have a functioning, moving frame. However, the spine is unable to handle the weight of the arms, and it cannot stand up freely due to how the feet were designed. While all parts move and remain attached, some are very loose, while others are very tight!
CHECK OUT THE VIEWABLE 3D MODEL OF THE FRAME HERE
Ultimately I concluded that this was due to several factors
In the future I will revisit this frame and redesign some parts to make it more compact and sleeker. I will aim to use flexible ABS/PLA and an FDM printer next time.
It was a very good learning experience which took far longer than I expected, overall totalling 3 months of on and off work.
Thanks for joining me on this journey!